Contents
2. AAA
Media Gallery Module Homepage
3. AAA
Media Gallery Result Pages.
4. AAA
Media Gallery Edit Image Functionality
5. AAA
Media Gallery Image Download
6. AAA
Media Gallery Image Upload..

TourBook AAA
Media Gallery
Module Overview

1.
Purpose
1.1. Purpose
The AAA Media Gallery module is used to archive,
review, update, upload, and download digital image and video files. Access to,
and use of specific functionality within the module, is dictated by the user’s
login credential access level. Not all users will have access to all aspects of
the AAA Media Gallery module.
The purpose of this document is to provide
an overview on the use of the new AAA Media Gallery module, the functionality
contained within, and the results that should be expected within each portion
of the module.
The AAA Media Gallery was designed to run
most effectively in modern, HTML5 compliant browsers. Internet browsers such as
Google Chrome, Firefox, and Safari are recommended for use when working in the
AAA Media Gallery. Use of older non-compliant browsers may cause certain
functionality, i.e. file “drag and drop,” to not function as designed.
1.2. Scope
This document will provide details on how to
search, review, edit, upload, and download image files using the new AAA Media
Gallery module.
2.
AAA Media Gallery Module Homepage

2.1 Submitting searches via the AAA Media
Gallery module
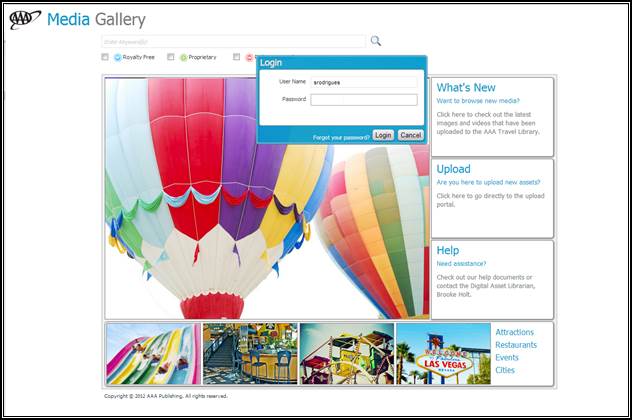
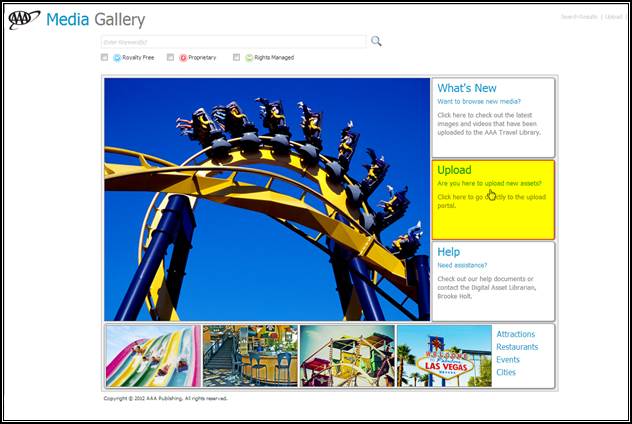
From
the AAA Media Gallery module homepage, the user is afforded multiple options to
choose from. Images can be searched for by specifying a keyword in the keyword
search box, or by using one of the navigation tiles to return a specific group
of images, based on type. Users also have the ability to enter the Upload
portion of the module by selecting the “Upload” tile in the right hand
navigation bar.
Upon initially loading the AAA Media Gallery
module search page and attempting to conduct a search, the user will be
prompted to enter their login credentials. If the user does not have login
credentials, an email request should be sent to lhendren@national.aaa.com.
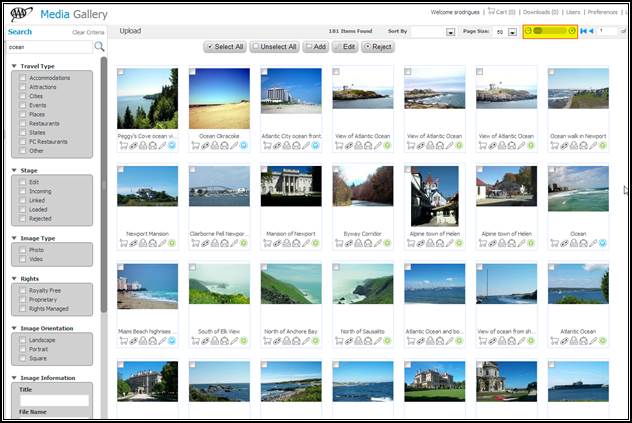
3. AAA Media Gallery Result Pages
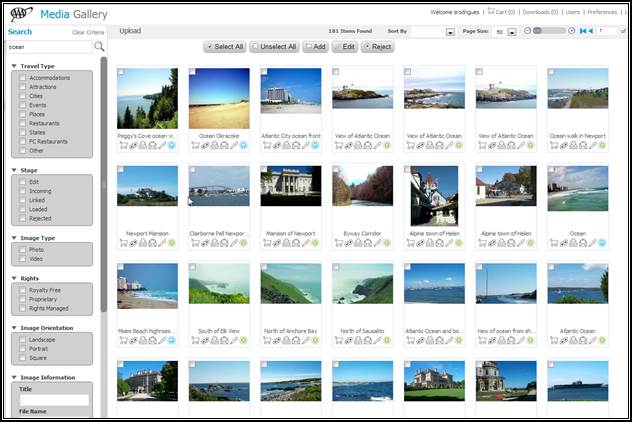
Once the user has entered their login
credentials, clicking the “Login” button will submit the credentials, and if
valid, a result set of images that correspond to the search criteria will be
returned.
3.1 Thumbnail image toolbar. ![]()
At the bottom of each thumbnail image, a
series of icons are available to the user. Each icon in the toolbar, when
clicked, performs a specific function for the corresponding image. A brief
description of the expected behavior for each is detailed below.
![]() - Cart icon - Clicking this icon
will add the image to the user’s cart for future download.
- Cart icon - Clicking this icon
will add the image to the user’s cart for future download.
![]() - Link icon – Indicates that
the image is “linked to TDR”.
- Link icon – Indicates that
the image is “linked to TDR”.
![]() - Download icon – Clicking this icon will
invoke the immediate download of the corresponding image.
- Download icon – Clicking this icon will
invoke the immediate download of the corresponding image.
![]() - Email icon – Clicking this icon will invoke
the process of emailing the corresponding image.
- Email icon – Clicking this icon will invoke
the process of emailing the corresponding image.
![]() - Edit icon - Clicking this icon will invoke
the image editor window for the corresponding image so that the metadata can be
edited.
- Edit icon - Clicking this icon will invoke
the image editor window for the corresponding image so that the metadata can be
edited.
![]() - Royalty Free - Indicates that an
asset can be repurposed any number of times in any media channel for editorial
or promotional purposes. If intended use is for a resale product (mug, t-shirt,
etc), please check in advance with Digital Media Services (407-444-7340). Photos
taken by AAA employees on personal time are marked as Royalty Free. RF also
applies to assets purchased or licensed as Royalty Free stock.
- Royalty Free - Indicates that an
asset can be repurposed any number of times in any media channel for editorial
or promotional purposes. If intended use is for a resale product (mug, t-shirt,
etc), please check in advance with Digital Media Services (407-444-7340). Photos
taken by AAA employees on personal time are marked as Royalty Free. RF also
applies to assets purchased or licensed as Royalty Free stock.
![]() - Editorial Only (RF) — Indicates that an
asset can be repurposed any number of times in any media channel for EDITORIAL
purposes only. Assets may not be used for any commercial or resale product.
Photos provided free of charge from partners or attractions are marked
Editorial Only (RF) unless explicitly stated otherwise.
- Editorial Only (RF) — Indicates that an
asset can be repurposed any number of times in any media channel for EDITORIAL
purposes only. Assets may not be used for any commercial or resale product.
Photos provided free of charge from partners or attractions are marked
Editorial Only (RF) unless explicitly stated otherwise.
![]() - Proprietary
– Indicates photos
taken by AAA employees on a AAA-sponsored trip are proprietary. AAA owns the
content and can repurpose without limitation.
- Proprietary
– Indicates photos
taken by AAA employees on a AAA-sponsored trip are proprietary. AAA owns the
content and can repurpose without limitation.
![]() - Rights
Managed - Indicates
one time use. Image must be relicensed in order to reuse. If you are interested
in using this image, please contact Lisa Hendren, Digital Media Services, at
407-444-7340 or at lhendren@national.aaa.com
- Rights
Managed - Indicates
one time use. Image must be relicensed in order to reuse. If you are interested
in using this image, please contact Lisa Hendren, Digital Media Services, at
407-444-7340 or at lhendren@national.aaa.com
![]() - Restricted - Use of
this image is strictly regulated. If you are interested in using this image,
please contact Lisa Hendren in Digital Media Services at 407-444-7340 or at lhendren@national.aaa.com
- Restricted - Use of
this image is strictly regulated. If you are interested in using this image,
please contact Lisa Hendren in Digital Media Services at 407-444-7340 or at lhendren@national.aaa.com
The look of the toolbar may vary from
thumbnail to thumbnail. This is dictated by the attribute of the image, as well
as user privileges. For example, a thumbnail for a “Rights Managed” image will
only have the icons for download and email if the user has the proper login
credentials. Also, any thumbnail that does not have a download icon should not
have an email icon either.
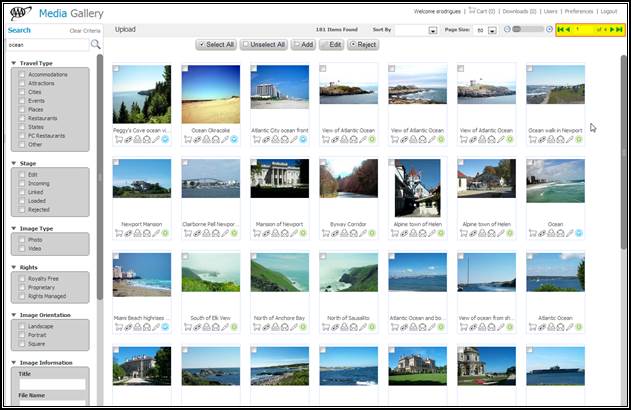
3.2 Altering the display of the AAA Media
Gallery module result pages
The results page display can be adjusted in a
variety of ways to make working with the images more manageable based on user
preference.
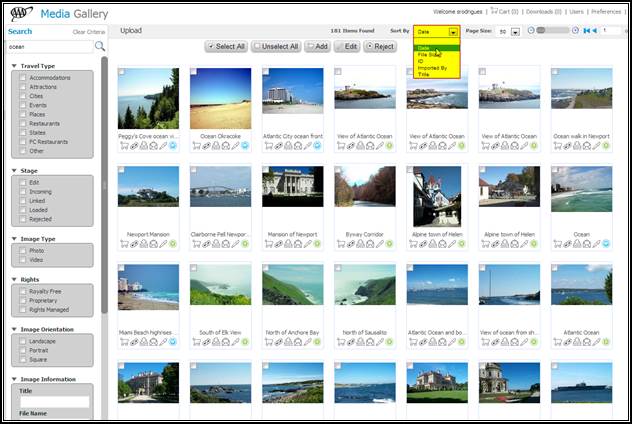
If the desire is to have the images on the
results page displayed in a specific order, the “Sort By” drop-down offers
several options to choose from. Once a sort option is selected, the entire result
set will be redisplayed in a manner that corresponds to the sort option
selected. Each sort option, and its expected behavior, is detailed below.
“Sort
By” Option Definitions
Date – The sort by “date”
option will reorder the result set and redisplay the images in order of oldest
submit date to newest submit date.
File
Size – The
sort by “file size” option will reorder the result set and redisplay the images
in order of smallest file size to largest file size.
ID – The sort by “ID”
option will reorder the result set and redisplay the images in order of lowest
image id to highest image id.
Submitted
By – The
sort by “submitted by” option will reorder the result set and redisplay the
images in A – Z alpha order.
Title –
The
sort by “title” option will reorder the result set and redisplay the images in
order of image title name. Titles containing special characters are displayed
first, followed by numeric titles, and finally in A – Z alpha order.
In addition to applying a sort option to the
results page, there are several other options that can be used to modify the
result display.
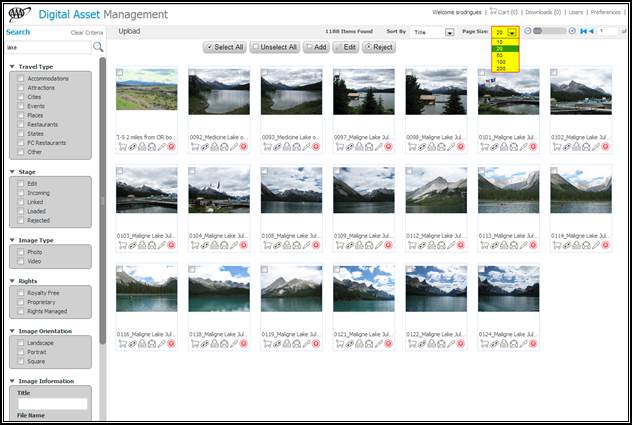
By default, each result page displays up to
fifty images. The “Page Size” drop down provides the ability to change the
amount of images per page. After selecting a value from the page size drop
down, the result page will be redisplayed to show the amount of images
selected. This will also adjust the number of pages in the result set
accordingly.
Using the “zoom” utility, the display size
of the thumbnails can also be altered. This can be done by either clicking the
plus/minus buttons, or sliding the zoom level left or right.
Finally, using the “page arrows,” the user
can scroll back and forth through the pages of the result set. The interior
arrows will move back and forth, one page at a time. Clicking the exterior
arrows will return the user to the first or last page of the result set. The
“page # of” value will automatically adjust accordingly as each new page is
loaded.
Using the various options available, the
user should be able to tailor the display of the result pages, into a layout
that best suits their needs. These options can also be used together to create
an even more detailed layout.
3.3 Submitting searches via the AAA Media
Gallery module result pages
Searches for images can also
be conducted from the result pages within the AAA Media Gallery module.
However, the search criteria utilities provided on the result page provides the
user more options to deliver a more refined set of images.
Simple keyword searches can be performed from
the result page search, similar to those submitted on the home page; however,
the search panel utility on the result page provides a much wider variety of
options that can be used to return a specific set of images. When these options
are used, only images that correspond to the exact criteria submitted will be
displayed. This allows the user to work with a more streamlined set of images,
and eliminates the need to scroll through unwanted images.
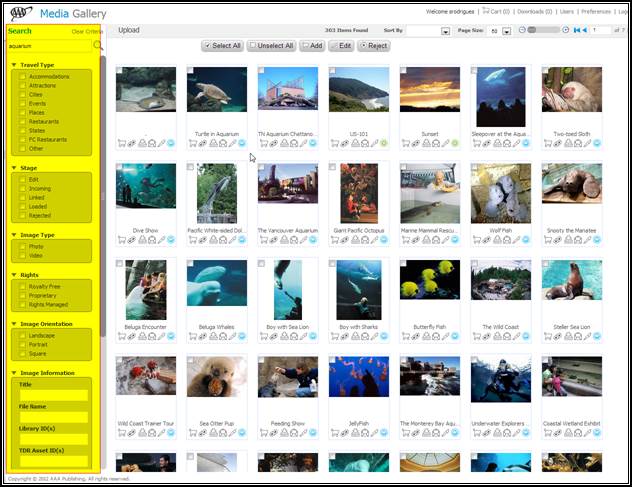
For example, a simple keyword search on
“aquarium” might return a seven page result set of 303 thumbnails. The user
then has to scroll through those thumbnails and determine which images are
desired.
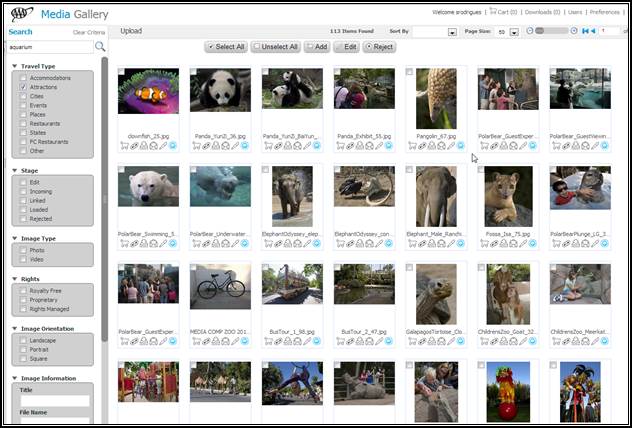
To limit the result set, the user could
conduct a keyword search on “aquarium,” and select the checkbox that
corresponds to the travel type of “Attractions.” The number of thumbnails
displayed has now been whittled down to 113.
To further narrow the result set, the user
can change the search variables, and resubmit the search. For example, a
keyword search on “aquarium” with a travel type of “Cities” and a stage of
“”loaded” will return a result set of sixteen thumbnails.
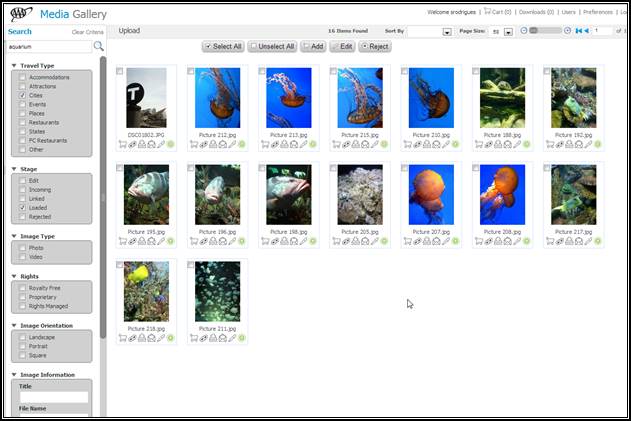
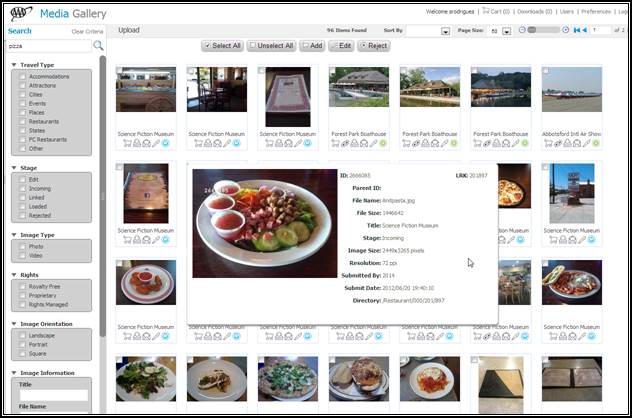
Once the desired result set is displayed,
the user can confirm the images returned correspond to the criteria, by simply
hovering over any thumbnail. This will open a “hover-over” window which will
display the detailed information for the image.
Users can use as few, or as many, search
variables as needed to return the desired result set of images to work with.
Keep in mind that the more options used in the search will further refine the
results, and, could end up returning no results. In these cases, it might be
necessary to remove some of the variables being used.
Previous search criteria, and corresponding
result sets, can be reset by simply clicking the “Clear Criteria” link above
the search magnifying glass.
4. AAA Media Gallery Edit Image Functionality
4.1 Editing a single image
NOTE: Thumbnails that are "Rights Managed” should not have
a checkbox for the average user. Only users with specific permissions have
download and edit privileges. In addition, the "download" and
"email" icons should not appear.
If a given thumbnail
does not have the "download" icon displayed below it, the
"email" icon should be hidden as well.
If a user would like
access to a file which is unavailable to them, they can contact Lisa Hendren.
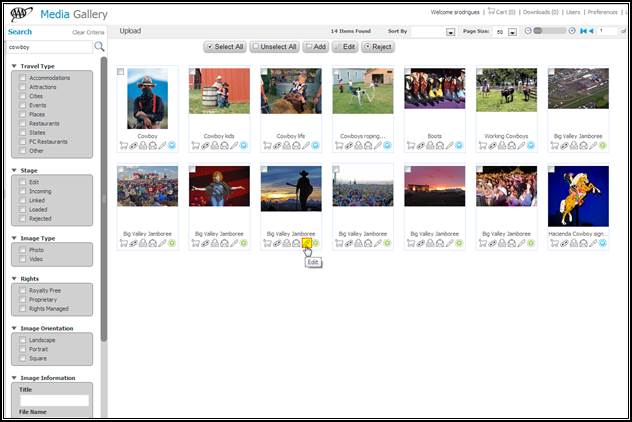
Once the desired result set is returned, the
process of editing the details for images can begin. The “Edit Image” dialog
box can be invoked by using the following methods. The user can either:
a.) Click the “Edit” icon,![]() , on the desired image
thumbnail:
, on the desired image
thumbnail:
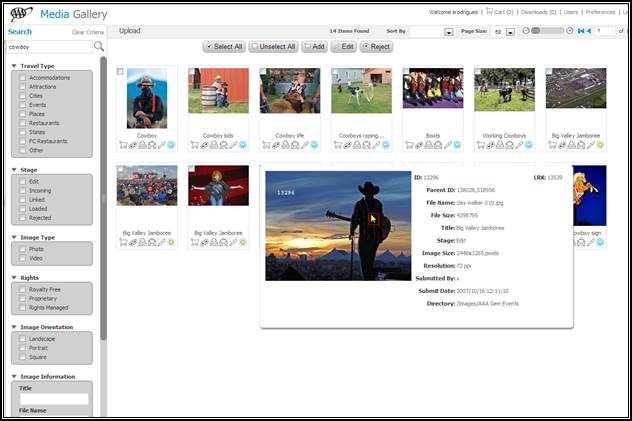
b.) Hover over the desired image thumbnail,
and click the overview pop-up window:
These first two options will open the Edit
image window for the selected image. The fields in the edit window will be
pre-populated with the details that currently exist. The user can choose to
keep the default values or update them accordingly. Any items that are blank do
not currently have associated details, and the user can update any of these
fields in the edit window.
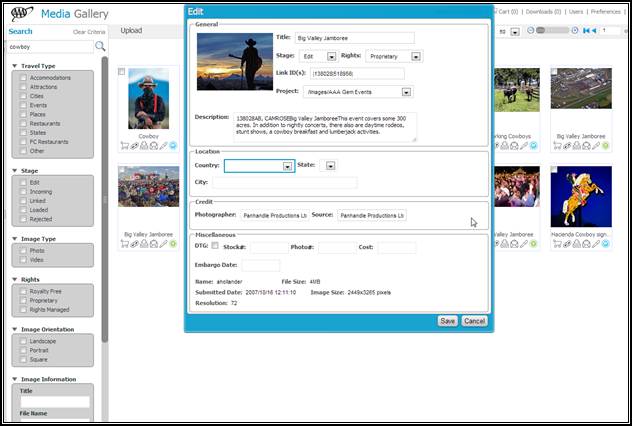
Ensure the data being entered into each
field is retained. Prior to clicking "Save," all fields can be
restored to their default values by clicking the "Cancel" button.
This will revert all changes and close the edit window.
Once all data has been entered in the edit
window, clicking the “Save” button will commit the changes, and apply the new
detail information to the image.
After the process of editing and updating
image details has been completed, the user should hover over the thumbnail on
the result page and confirm the new detail data is reflected in the overview
dialog box.
4.2 Editing multiple images
If there are several images that need to be
edited, this option is also available from the results page. The user can
select a single image, several images, or all images in the result for editing
purposes. This can be done by clicking the checkboxes for the desired images,
or by using the “Select All” button.
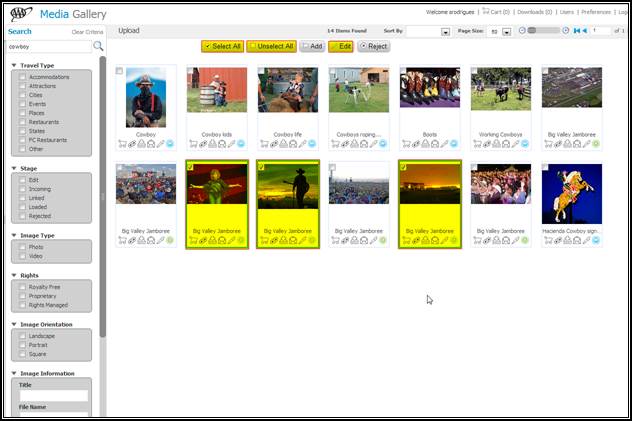
Once the desired images have been selected,
clicking the “Edit” button will open the edit image dialog box. When editing
multiple images, the look of the edit image window differs from the edit image
window that is opened for a single image. This is by design, and accommodates
the display and editing of multiple images.
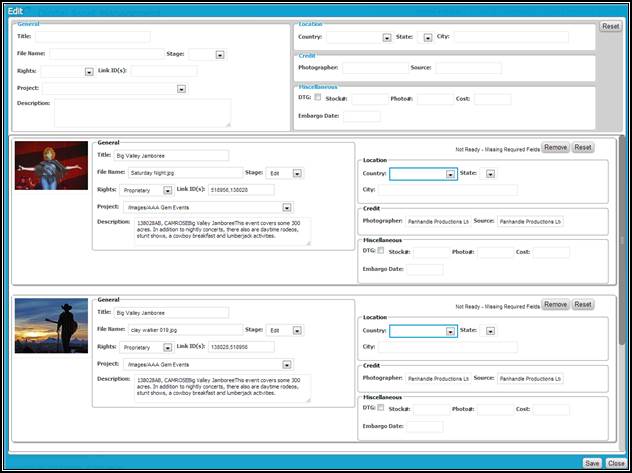
When editing multiple images the edit image
window will contain a panel of blank fields at the top of the page. This panel
is used to enter new image details, which will then be propagated to all of the
images listed below. As data is entered into a field, the value is applied to
the corresponding field, for all images in the list.
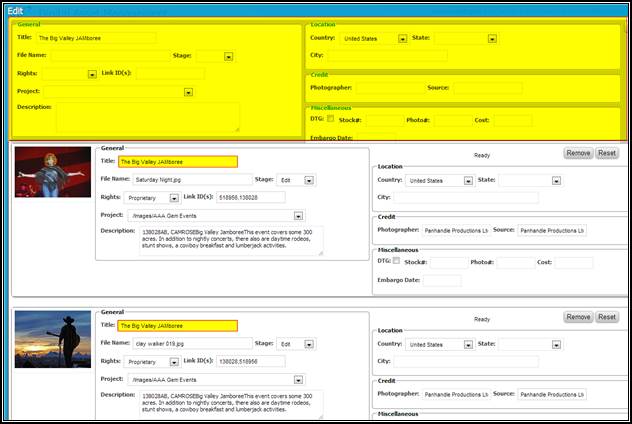
Once all data has been entered, clicking the
“Save” button will commit the changes, and apply the new detail information to
all images in the list.
If the list of images each require
individual updates this can be performed by updating the fields in each
individual image panel, and then clicking “Save.” The user can choose to update
and save one record at a time, or, update the data in each image panel, and
then save all changes at once. Clicking the “Save” button will commit the
changes, and apply the new detail information to each individual image in the
list.

Prior to saving changes to the details, the
user has the ability to reset the data to the default values. This can be
accomplished by clicking the “Reset” button that corresponds to the image to be
reset.
Should the user decide that an image does
not require any updates, that image can be removed from the list by clicking
the “Remove” button that corresponds to the image to be removed.
After the process of editing and updating
image details has been completed, the user should hover over the thumbnail on
the result page and confirm the new detail data is reflected in the overview
dialog box.
5. AAA Media Gallery Image Download
5.1 Selecting and downloading a single image
NOTE: Thumbnails that are "Rights Managed" should not
have a checkbox for the average user. Only users with specific permissions have
download and edit privileges. In addition, the "download" and
"email" icons should not appear.
If a given thumbnail
does not have the "download" icon displayed below it, the
"email" icon should be hidden as well.
If a user would like
access to a file which is unavailable to them, they can contact Lisa Hendren.
From the results page, users with the proper
credentials also have the ability to download images. The user has the option to
download one image at a time or select a group of images for download from the
shopping cart.
To download one image at a time, simply
click the “Download” icon on the desired image thumbnail.
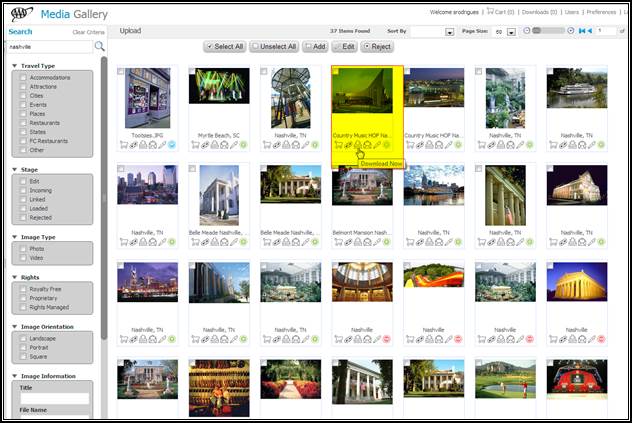
The user is then presented with a pick list
to choose the file type to be downloaded.

Once the image type is selected, the
download will begin and the image is saved to the user’s download directory. In
Windows, a sample path would be, C:\Users\user_name\Downloads.
Once the download is complete, the image can
be opened by clicking on the dropdown located in the bottom left corner of the
window, or by navigating to the download location described above.
 .
.
5.2 Selecting and downloading multiple images
In addition to being able to download
individual image files, the user can also select and download multiple images
from the results page. This can be done by clicking the checkboxes for the
desired images or by using the “Select All” button to include all images in the
result set.
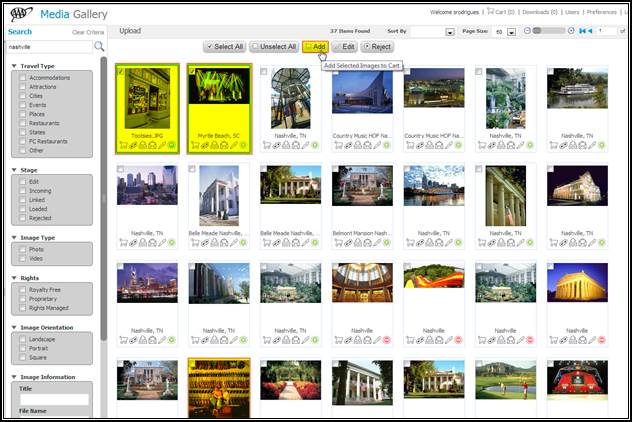
Once the desired images have been selected,
clicking the “Add” button will add all images to the user’s shopping cart. The “Cart”
link at the top of the page will then reflect the number of images added to the
cart that are pending download.
To begin the download of the images in the
cart, simply click the “Cart” link at the top of the page.
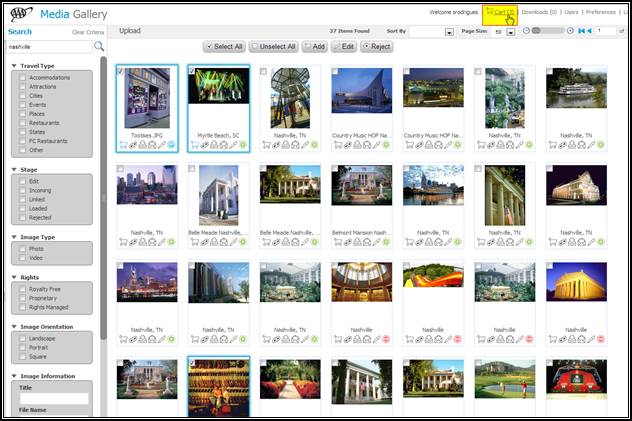
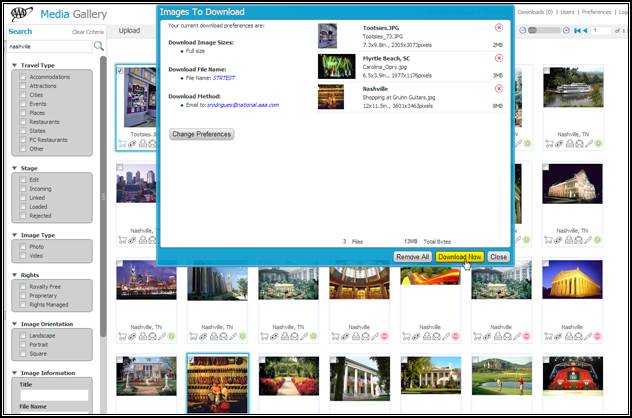
The “Images to Download” dialog box will be
opened with a list of the image names to be downloaded displayed on the right. From
this window, users can review and update their download preferences, remove
individual or all images, close the download window, or begin the download
process for the selected images.
The user preferences can be reviewed by
clicking the “Preferences” link in the upper right portion of the window. From
the preferences window, the user can update the download locations, along with
other settings used by the AAA Media Gallery module.
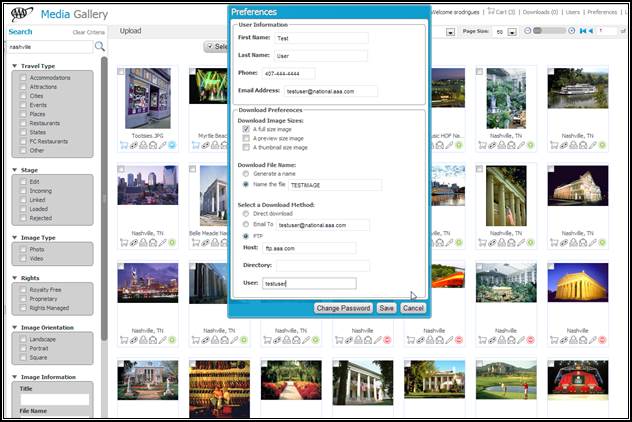
Clicking the “Save” button
will apply any changes made to the Preferences page. If no changes are
required, clicking the “Cancel” button will close the Preferences window, and
return the user to the results page.
Once the list of images for download has
been reviewed, the user can proceed with the download process by clicking the
“Download Now” button.
Clicking the “Download Now” button will
initiate the download process, and all images will be saved to the location
specified in the user preferences. Once the download is complete, the user will
receive an email confirming that the requested images have been successfully
downloaded. The confirmation email
will also indicate the names given to the saved images. This is especially
helpful as it may be necessary for the download process to change file names to
avoid overwriting existing files. Once the confirmation email is received, the
user should navigate to their specified download location and confirm the
images are present.
5.3 Email option for images
In addition to being able to download image
files, the user can also select to have individual images sent to a specific
email address. After identifying the desired image, clicking the ![]() icon, will open the “Email Image” dialog box.
icon, will open the “Email Image” dialog box.
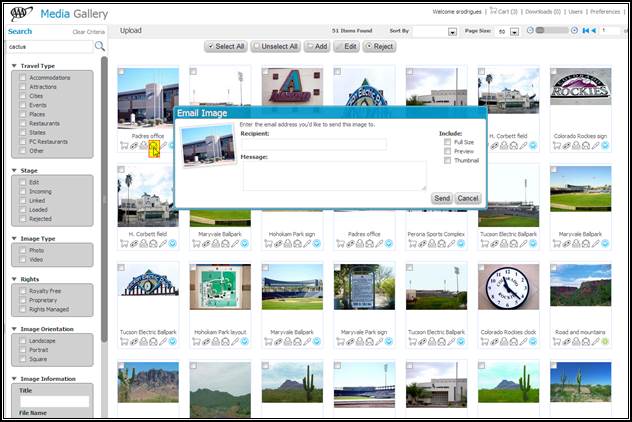
In the “Recipient” field enter the email
address where the images are to be sent. The “Message” field is optional, and
allows the user to provide verbiage that will populate the body of the email.
Finally, the user has the ability to select which image format using the
“Include” check boxes. The user can select any combination of file formats,
including all three options. If no file types are chosen, the email will not be
generated.
Once the email address and file types are
selected clicking the “Send” button will send the email to the specified email
address. The selected images will be included as attachments which can then be
saved to a location of the user’s choosing.
6. AAA Media Gallery Image Upload
6.1 Selecting images for upload
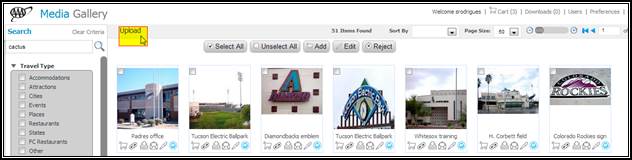
The AAA Media Gallery also provides the user
the ability to upload new images for future use. The Upload functionality can
be accessed from the homepage by clicking the “Upload” tile or from the result
page by clicking the “Upload” link.
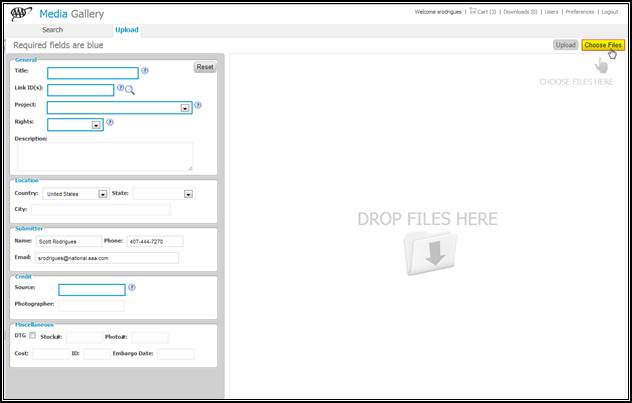
Regardless of the
method used, the AAA Media Gallery upload page will be displayed, and the
process of choosing images files to be uploaded can begin. The AAA Media
Gallery affords users the ability to “drag and drop” image files directly to
the “Upload” page. Image files can be dragged from a variety of locations
including the user’s local machine, email, network drive, etc. Provided the
image file is of a supported format, simply hold the mouse button on the
filename, drag the file name to the “Drop Files Here” portion of the “Upload”
page, and release the mouse button. The file is now in the queue to be
processed for uploading. The user may “drag and drop” single or multiple files
at once.
Users also have the
option of clicking the “Choose Files” button in the upper right corner of the screen
to locate image files. If this option is selected, the ability to drag and drop
files will not be available.
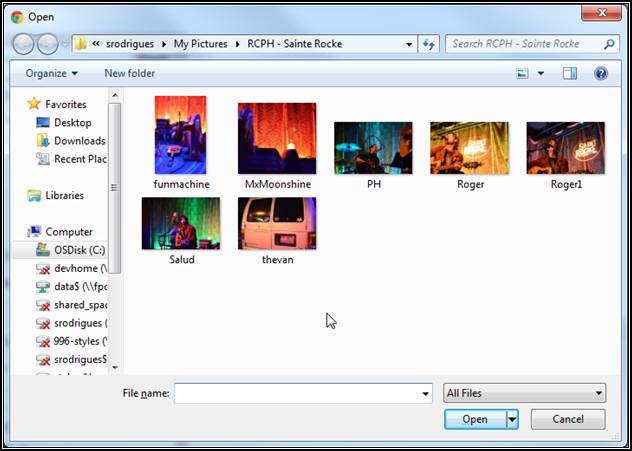
Regardless of where the files reside, the
user’s local PC, a network drive, or external device, the explorer window can
be used to locate them. In order to upload an image it must be one of the
following formats; tiff, jpeg, jpg, gif, bmp, or png.
If the image is in a different format, it
must be converted to one of the supported file types before uploading.
Once the image files have been located, and
verified to be in a supported format, they can be added to the upload page.
This can be done using several different methods depending on the amount of
images to be selected for uploading.
To select a single image to add to the
upload page the user can either double-click the file, highlight the file and
click the “Open” button, or drag the filename to the “Drop Files Here” portion
of the Upload page. [reminder, drag and
drop functionality is not supported when locating files with the “Choose Files”
option].
To select a several different images from
the same directory, click the first image, then, while holding the [CTRL] down,
select additional files. Once all images have been selected, click the “Open”
button, or, drag the filenames to the “Drop Files Here” portion of the Upload
page.
To select all images from the same
directory, first, select any image, and then press [CTRL+A]. This will select
all images in the directory. Once all images have been selected, click the
“Open” button, or, drag the filenames to the “Drop Files Here” portion of the
Upload page.
If
additional image files exist in different locations, the user can navigate to
those locations in the explorer window, and repeat any of the steps above, to
add the files to the upload page.
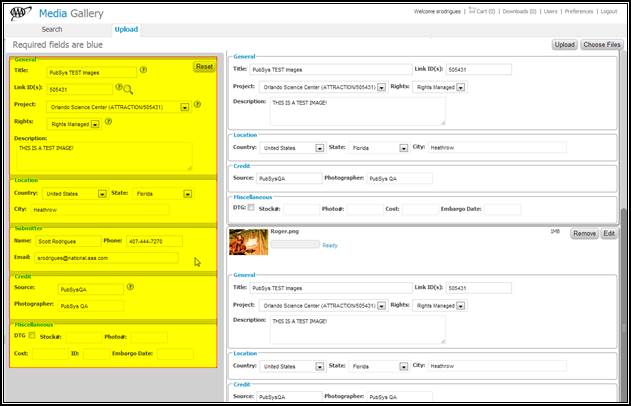
6.2 Editing image details prior to upload
Once all images to be uploaded are
successfully added to the upload page, the next steps in the upload process can
begin.
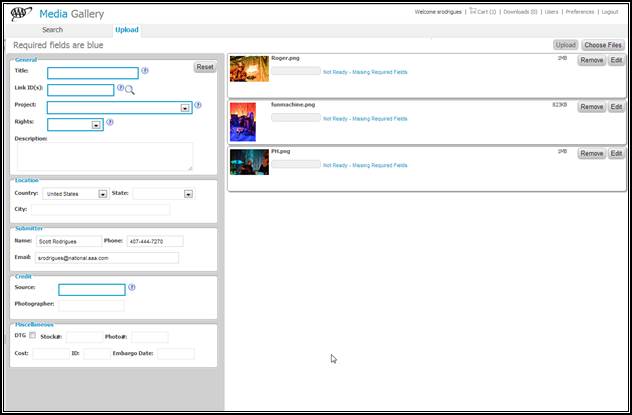
Before
the upload process can be completed, each file must be edited to contain
required information. This can either be done by updating each file
individually, or by applying the same data values to all files at once. If an
errant image has been added to the upload page, it can be removed from the
list, prior to editing, by clicking the “Remove” button for the corresponding
image.
To update the image data, one file at a
time, click the “Edit” button to expand the image detail panel.
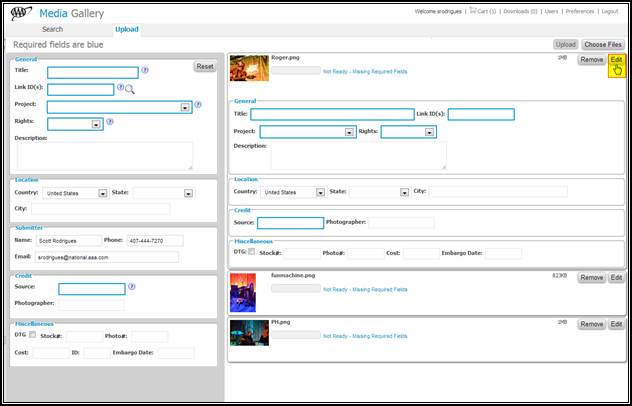
Although there are multiple fields for data
to be entered into, only five of these fields must contain data for the image
to be ready for upload. The required fields, and a brief description, are
provided below. For a more detailed explanation of each field, simply hover
over the ![]() icon in the left hand
portion of the upload page.
icon in the left hand
portion of the upload page.
Title
– A brief description of what the subject of the photo is.
Link
ID – ID used to connect the content to other AAA content stored in TDR.
Project
– This field should pre-populate based on the link id entered.
Rights
– Used to set the rights level for the image which dictates how an asset can be
repurposed.
Source
– The name of the content provider.
The remaining fields should be addressed if
the user has appropriate data to include.
To update the image data, for all image
files at once, enter the required data in the left panel, along with any other
optional information. As the data is entered in each field, as the user tabs to
the next field, the data will be propagated to the corresponding field on each
image.
If errant data is entered, the user can
click the “Reset” button. This will clear all data from the left panel. It will
not clear any data pushed to the individual image files. That data will be
overwritten as the user enters new data in the left panel.
Whether the files are updated individually,
or in bulk, once the required fields have been updated, along with any
additional data updates, the status of the image(s) will change to “Ready.”
This indicates that all required data is in place, and the file(s) is ready to
be uploaded.
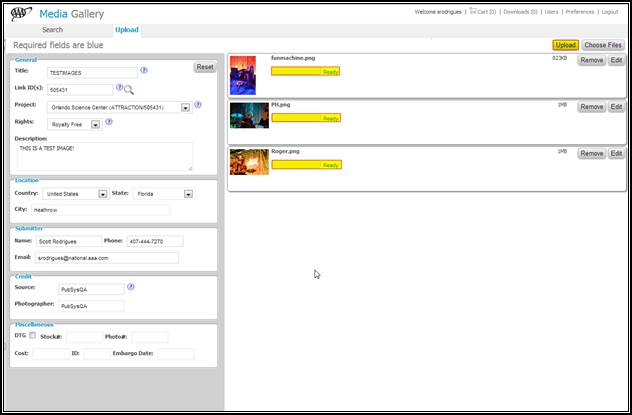
At this stage, the files are
ready to be uploaded. To complete the upload process, simply click the “Upload”
button. A
progress indicator will be displayed, and once all files have been successfully
transmitted, the user will be presented with the following message.

Shortly after the images are uploaded they
will be available in the AAA Media Gallery module, and in Media Bank. However,
the images will not be pushed to TDR until they have been reviewed by Lisa
Hendren.
7. User Preference Settings
After successfully logging into the AAA
Media Gallery users have the option of configuring several preferences that are
used by various parts of the application. These preferences can be used to
define general user information, default locations for image downloads, and the
ability to change the login password.
To launch the Preferences dialog box, simply
click the “Preferences” link in the upper right portion of the screen.
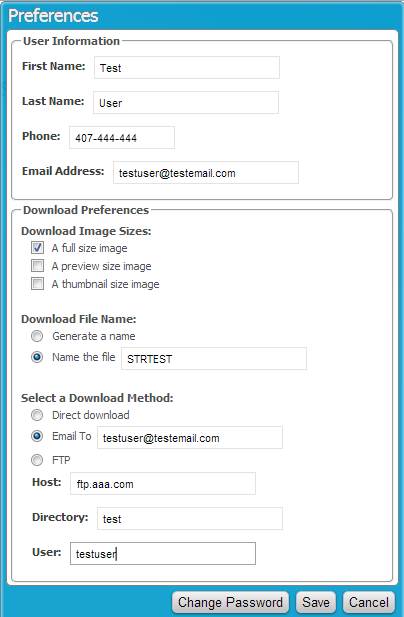
The User Information panel
allows the user to enter their personal information. These fields are not
required, and, if left balnk, should not impact any functionality within the
AAA Media Gallery.The user can choose to enter data they desire in these
fields.
The “Download
Preferences” panel is used to provide default values that will be used when
downloading images from the cart only. They do not apply when selecting the
download icon from the image thumbnail toolbar. A description of these fields,
and the functions they serve, is provided below.
Download
Image Sizes – Three checkboxes which, when selected, will automatically
include that selected file type in all downloads from the cart.
Download
File Name – These radio buttons allow the user the option of having the system
generate a file name for images downloaded from the cart, or, assigning a
specific filename to be used.
Download
Method - The “direct download” option will save all files downloaded from
the cart, in the user’s default image download directory. The “Email To” option
will email all images downloaded from the cart to the specified email address.
The “FTP” option will save all images downloaded to an FTP point. If the FTP
option is selected, the user must also include the host name for the FTP point,
the directory name where the images will be saved, and a valid user name.
When using the FTP option, after initiating
the download, the user will be prompted to login into the defined FTP
location.
8.
Summary
8.1 AAA Media Gallery Manual Test Cases
In addition to the details provided in this user
guide, users may also refer to the AAA Media Gallery manual test cases, for
further reference. These test cases can be found at:
http://pubbckup:7777/PubOpsWiki/Wiki.jsp?page=AAAMediaGalleryFormallyDAM
Users should email any technical questions,
or, issues with the AAA Media Gallery module, to *Publishing Systems Tech
Support pubsystechsupport@national.aaa.com.
For assistance with any image, copyright, or
training requests, users should contact Lisa Hendren at blhendren@national.aaa.com.